- Making the Most of a 32 x 40 Sheet
- Trimming Mat Board to Size
- Trimming Mat Board to Size with Straight Edge
- Trimming Mat Board to Size with Compact
- Trimming Mat Board to Size with Simplex
- Mat Cutting
- Cutting Single Mat Using a Straight Edge
- Cutting a Single Mat With a Simplex-Basics
- Cutting a single mat with a simplex-detailed
- Cutting a double mat
- Cutting a double mat- detailed professional version
- The professional framers secret for cutting a double mat
- How to measure and cut a double mat,
- Cutting a stepped corner mat – basics
- Cutting stepped corner mats – detailed
- Offset (stepped) corner mat
- Slip sheets
- The importance of using a slip sheet when cutting
- The importance of using a backing sheet
- Why am I getting a ragged cut?
- How to avoid rough or ragged edges when cutting mats
- Dealing with inconsistencies in the bevel edges
- Adjusting your mat cutter for proper blade depth
- The importance of proper blade depth
- Why am I getting a hook in the corners or curve in the bevel cut?
- How come I don't cut all the way through the mat board?
- How to conquer overcuts and undercuts?
- Dealing with overcuts and undercuts
- Why am I getting overcuts in the corners?
- Why are my mats not coming out square?
- Why is my bevel cut going the wrong way?
- How to cut left handed
- How to cut a 40" sheet of mat board on the 32" compact mat cutter
- Is using production stops the fool proof way to get perfect mats?
- Tips for working with production stops on your mat cutter
- Basic mat cutter maintenance
- Mounting your artwork
- Grappling with conservation and archival mounting concerns
- Supporting Artwork
- Hinge mounting T, V and S methods
- A simple method to a T-hinge mount
- Trapping methods
- Permanent mounting
- Wet mounting
- Pressure sensitive adhesive mounting
- How to mount artwork using positionable mounting adhesive (PMA)
- Spray adhesives
THE PERFECT DOUBLE MAT
METHOD TWO uses a slightly smaller board for the "undermat"— the small inner border that will show inside the window opening. The undermat is cut while attached to the top mat, allowing the top mat to serve as a template, creating identical parallel borders on both mats.
1. Cut one board 11" x 14" for top mat. Cut one board 10-3/4" x 13-3/4" for undermat. Note: The undermat board is smaller than the top mat so that its edges do not interfere with the top mat during cutting.
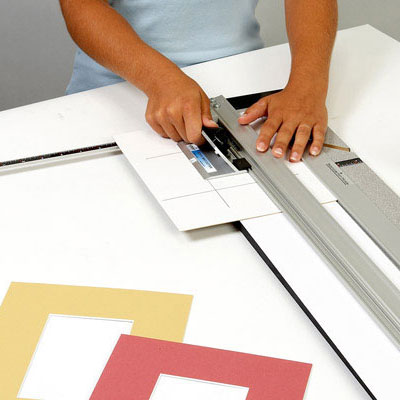
2. Put the board for top mat in cutter face down and cut a 2-3/4" border. Save the fallout (the rectangle of board that fell out of the opening.)
3. Apply four strips of double-sided tape to the surface of the undermat board. Attach it to the back side of the top mat.
4. Replace the fallout in the mat, attaching it to the board beneath with a short strip of double-sided tape.
5. Set mat guides or measure and mark a 3" border on the back side of the undermat board.
6. Place the boards in the mat cutter face down and cut the 3" border all the way around.


