- Making the Most of a 32 x 40 Sheet
- Trimming Mat Board to Size
- Trimming Mat Board to Size with Straight Edge
- Trimming Mat Board to Size with Compact
- Trimming Mat Board to Size with Simplex
- Mat Cutting
- Cutting Single Mat Using a Straight Edge
- Cutting a Single Mat With a Simplex-Basics
- Cutting a single mat with a simplex-detailed
- Cutting a double mat
- Cutting a double mat- detailed professional version
- The professional framers secret for cutting a double mat
- How to measure and cut a double mat,
- Cutting a stepped corner mat – basics
- Cutting stepped corner mats – detailed
- Offset (stepped) corner mat
- Slip sheets
- The importance of using a slip sheet when cutting
- The importance of using a backing sheet
- Why am I getting a ragged cut?
- How to avoid rough or ragged edges when cutting mats
- Dealing with inconsistencies in the bevel edges
- Adjusting your mat cutter for proper blade depth
- The importance of proper blade depth
- Why am I getting a hook in the corners or curve in the bevel cut?
- How come I don't cut all the way through the mat board?
- How to conquer overcuts and undercuts?
- Dealing with overcuts and undercuts
- Why am I getting overcuts in the corners?
- Why are my mats not coming out square?
- Why is my bevel cut going the wrong way?
- How to cut left handed
- How to cut a 40" sheet of mat board on the 32" compact mat cutter
- Is using production stops the fool proof way to get perfect mats?
- Tips for working with production stops on your mat cutter
- Basic mat cutter maintenance
- Mounting your artwork
- Grappling with conservation and archival mounting concerns
- Supporting Artwork
- Hinge mounting T, V and S methods
- A simple method to a T-hinge mount
- Trapping methods
- Permanent mounting
- Wet mounting
- Pressure sensitive adhesive mounting
- How to mount artwork using positionable mounting adhesive (PMA)
- Spray adhesives
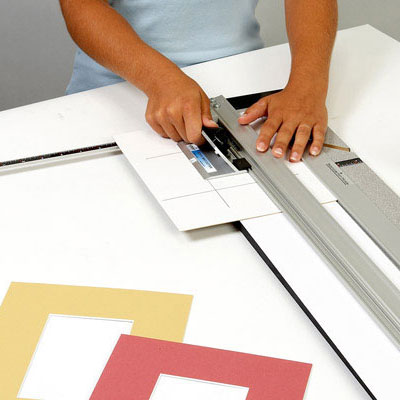
CUTTING A SINGLE MAT USING A HAND-HELD CUTTER
A single mat is the most basic type of mat. It is a single piece of matboard with one opening cut into it.
1. Trim the matboard to size.
2. Using a pencil and T-square, measure and mark the back of the matboard. Let the lines overlap at the corners, so the intersections are clearly visible.
3. Place the mat face down on a piece of scrap matboard that is larger than the board that is to be cut.
4. Slide both boards to the closest edge of the table.
5. Set the T-square on the penciled line. Leaning against the head of the T-square will help to hold it in position while cutting the mat.
6. Set the cutter against the T-square and line up the guide line on the cutting head with the horizontal pencil line.
7. If mat cutter style #1100 or #2000 is being used, insert the blade and push the blade and handle towards the top, stopping at the horizontal line.
If style #2000 or #4000 is being used, start at the top horizontal line, insert the blade into the matboard and pull the cutting head towards the bottom horizontal line.
Cut all four sides in the same manner. Be careful to stop and start accurately to make neat corners.


