The term "fitting" is used by professional framers to refer to the process of assembling all of the items that will go into the frame, installing them in the frame, sealing up the back, and attaching the hardware for hanging. Here is an overview of the materials needed for fitting.
HAMMERS
A small claw hammer, tack hammer or other, but make sure it has a small head, to minimize the force and tap easily against the heads of small nails.
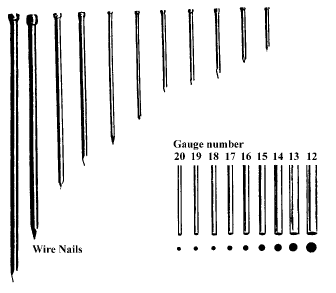
NAILS
Short, thin, sharp wire brads to nail sideways into the rabbet of the frame. Hard woods like oak and maple will require pre-drilling.
SCREWDRIVERS
For joining metal frames, depending on the hardware. Have several sizes handy.
DRILL
This may be needed for pre-drilling the holes for nails and screw eyes in very hard woods. Small bits, proportionate to the nails, will be needed.
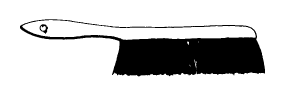
DUSTING BRUSH
Extremely useful for removing dust and other particles from the glass, mat, and artwork before sealing up the frame.
GLASS CLEANER
Choose one with no ammonia, coloring or perfume, to minimize the chemical residue that will be sealed into the framing.
PAPER TOWELS
For cleaning the glass and frame. Plain white or brown kraft is best, so there is no chance of color transfer to artwork, matting, or other parts of the framing. Fluffy towels leave more lint than hard commercial towels.
MEASURING RULER
Measuring of frames and all other framing materials should be done with a good quality carpenter's rule, artist's rule or metal tape measure. Yardsticks and cloth measuring tapes are not accurate enough for framing purposes. Even 1/8" of incorrect measurement could result in buckled artwork, so using a good measuring device is very worthwhile.
DUST COVER PAPER
A sheet of paper large enough to cover the entire back of the frame, typically brown or black kraft paper such as that used for mailing or wrapping packages. If framing valuable art, use sheets of good quality artist sketch paper. White Glue or Double-stick Tape This is used to attach the backing paper to the back of the frame.
CUTTING BLADE
Single-edge razor blade or utility knife for trimming the backing paper flush with the edges of the frame.
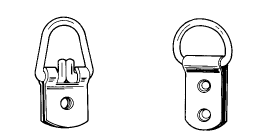
HANGING HARDWARE
Attaches to the back of the frame to allow hanging on the wall. Screw eyes, sawtooth hangers, or D-rings can all be used. All are available at craft, hardware, and home improvement stores. Use a size appropriate for the size and weight of the frame.

the size of the moulding and the weight it must support.
screwed into a wood frame. They may be used with or without wir
BRAIDED WIRE
If using screw eyes, wire will be wound around the eyes. Choose a wire with a breaking point about 3 times the weight of the picture.