Sectional metal frames are easy to put together. Different companies provide slightly different hardware, but most of them work the same way.
1. Prepare a clean work surface. Wood splinters and bits of glass can scratch the frame. Lay out the frame sections face down.
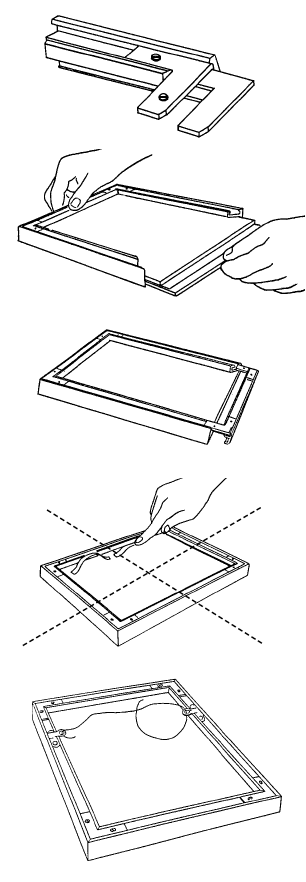
2. Insert one of the L-shaped hardware pieces (some brands require two pieces) into both ends of one frame section. Slide the two adjoining sections onto the hardware, and tighten the screws. Adjust the alignment of the frame sections during tightening if necessary, to make the corners join neatly.
3. Stack the glass, mats, artwork and backing together, and slide this unit into the channel of the frame. The layers can be inserted separately, but be careful not to scratch the surface of the mats or artwork on the edge of the glass.
4. Insert the remaining angle hardware into the remaining section of the frame. Slide the hardware into the side pieces of the frame, and tighten the screws. Once again, check the alignment of the corners while tightening, or tighten, check, loosen and adjust as needed.
5. There may be space remaining in the frame channel. The space must be filled in some way to hold the materials securely in the frame. The packet of hardware may have included "spring clips," which can be inserted between the frame rail and the backing board. These can place too much pressure on the materials in the frame, resulting in buckling of mats or artwork in the future. To avoid this, use strips of matboard or foam center board instead of the clips, or open one end of the frame and add additional full sheets of backing board. (Not too tight—the fit should be secure but should not exert pressure.)
6. Insert the hanging hardware provided with the frame, which may be one sawtooth hanger or two pieces with holes for attaching wire.