For a long time some mat cutters came with an impressive accessory known as an "angle plate," a tool used for marking out and holding mat board for cutting angles other than right angles. By using it, you could cut octagon-shaped windows, diamonds, triangles or stars – in fact, any shape of window that consists of straight lines.
Not a few owners of mat cutters that didn't offer an angle plate concluded that they were unable to cut such mats. But they were wrong.
If you own a mat cutter that has a guide rail, you, too, can cut angled mats, and for a lot less than the cost of a pricey angle plate.
In fact, all you need is a plastic 45/90º triangle (a $2.50 investment at any office supply store) and you're ready to cut impressive angled mats like the 8-sided mat shown here. Here's how.
First, set your mat cutter's mat guide and mark out four borders of 1 3/4". At this point you've defined your window opening in pencil.
Beginning at one corner of the window you've just marked, measure out along one of the lines 1 3/4" and draw a line to intersect the first line. Then measure down the vertical axis 1 3/4" and mark another line to intersect. Each line should be about 3 inches long. The combination of lines forms a small penciled square.
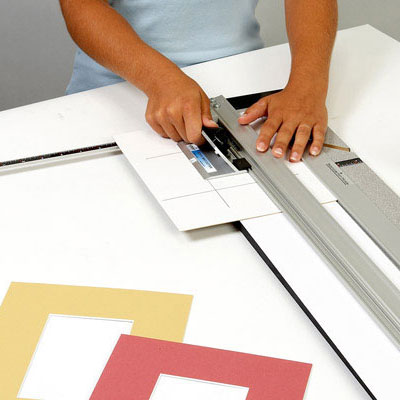
Align the guide rail of your mat cutter through the box at a 45º angle from corner to corner (Figure 3). Mark along the guide rail. The pencil line will bisect the box at 45º.
Repeat this procedure in each corner, defining the 45º angled corners.
Place the guide rail in alignment with one of the 45º angles you marked. Using the 45/90º triangle, place it so one of the 90º edges is against the guide rail and the other is at a right angle to the guide rail. Position it so the corner of the triangle is at the corner of the penciled square.
Make a mark along the full length of the 90º side of the triangle. The line you mark will extend at a right angle to the 45º angle that bisects the box. This is the key to the whole technique. Only by having lines at right angles to the start and stop points of the line can you start and stop the cut in the right places. You can draw and cut a line at any angle, starting and stopping in the right places, as long as you have lines extending from it at 90º angles.
Position the triangle at the opposite corner of the penciled square and extend a line at a 90º from it. You now have lines to start and stop from.
Leave the mat under the guide rail and position the cutting head on the start line.
Insert the blade and begin cutting. Cut until you reach the stop line.
You have made a cut at 45º relative to the perimeter edge of the mat. Repeat this procedure for each of the four angled corners.
Set the mat guide back to 13/4" and prepare to cut the straight sides of the mat's window Place the mat under the guide rail. Remember, in each corner there is a penciled box. Start at the top line of the penciled box at the top left. Stop at the bottom line of the same penciled box. This cut connects with the two angled cuts made earlier. Repeat for the remaining three sides.
An impressive 8-sided mat results. Apply the premise of this core technique to cut octagonal mats, triangular mats and even star shaped mats, all for less than the cost of the instructions that come with an angle plate. Now that's versatile and economical.


