


Sanding Picture Frame Moulding
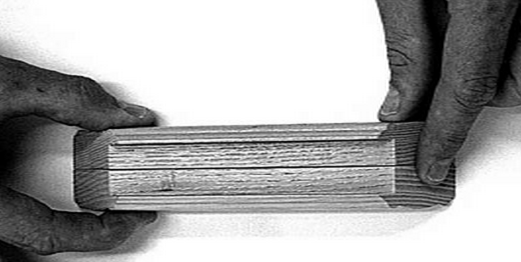
Logan offers the Model 200-2 Sander to make the job of sanding quick, simple and precise. To make a pair of frame sections true, sand only one end of one section. If you are sanding by hand, use only fine grit sandpaper. Keep checking your progress until the two sections align at both ends when placed on their backs side by side with the miters facing up (Figure F-1).
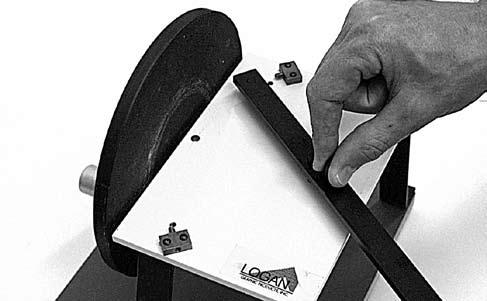
Step One: Set the alignment bar of the sander at 45-degrees (Figure F-2).
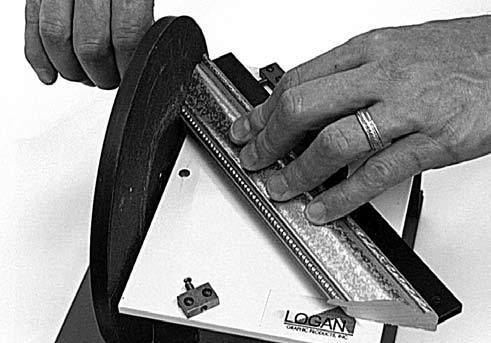
Step Two: Place the frame section to be corrected against the alignment bar so the finished side is up and the rabbet is facing toward the center of the sanding disc.
Step Three: Hold the moulding so it presses against the alignment bar and bring the miter face firmly against the surface of the sanding disc (Figure F-3).
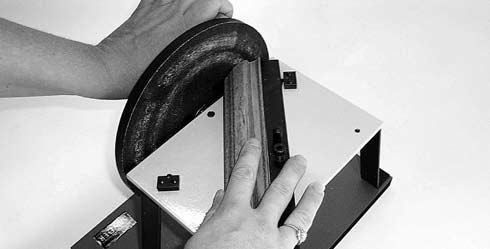
Step Four: Rotate the sanding disc. The disc should always rotate downward onto the top of the moulding (Figure F-4). Rotate the disc four to six times. Do not press too hard. It is better to have more rotations as opposed to harder pressure.
Step Five: Check your progress by placing the two sections on their backs side by side with the miters facing up (Figure F-1 above) and running a finger across the surface of the two miters. When the miters are flush at both ends, the two sections are precisely the same length and ready for joining. Repeat the above procedure for the other two sections and you are ready to join your frame.


