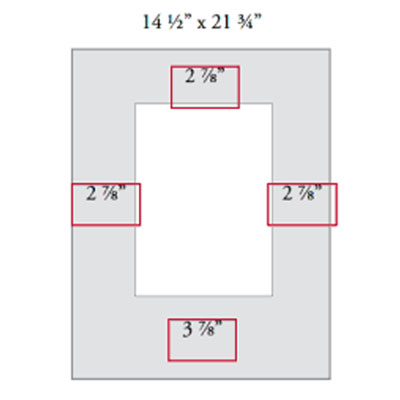
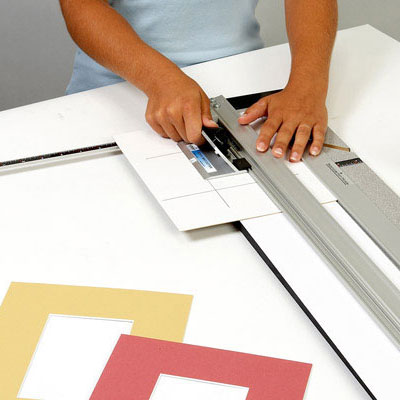
The multiple opening mat, sometimes called a "collage mat", is a mat with a series of windows in it. It is used most often to present photographs.
Much of the challenge in cutting a multiple opening mat is in figuring out the measurements. To simplify the task, you might want to decide on a uniform size for all the windows, even if some photos are larger than others, and try to orient the windows uniformly. In other words, place all the windows in either a portrait orientation or a landscape orientation and avoid mixing them. The more uniform you design your multiple opening mat, the easier it will be to measure and cut.
If the windows are to be uniform, they cannot be larger than the smallest photo you have, and should in fact be slightly smaller so the edges of the windows can overlap the edges of the photos and hold them in place. If your smallest photo is 4"x 6", the windows should 3 3/4 " x 5 3/4 ", providing an eighth-inch overlap along each edge. Now how many windows will you have? Once you've decided on the number of windows, you can then calculate the "bracketing borders" (the outer borders that will surround all the windows).
Let's say you're going to have eight windows of 3-3/4 " x 5-3/4" arranged in two rows of four, all in portrait orientation. To calculate the bracketing borders, multiply the width of each window by the number of windows in each row to get the equivalent width of a single window. In our case that would be 3-3/4" x 4 = 15". Then, multiply the height of each window in each column to get the equivalent height of a single window: 5-3/4 " x 2 = 11-1/2".
What we discover from this exercise is that if we were going to have a single window rather than eight small windows, that window would be 11 1/2 " x 15". A window of this size would call for borders somewhere between 13/4" and 21/2" on each side. To make the math easy, we might settle on borders of 2" on each side. Therefore, the bracketing borders for all eight of our small windows should be the same—2".
Next, we need to determine how much space should go between each window. The spaces between each window should be no wider than the bracketing borders, but they can be narrower. So we experiment, adding up the spaces, windows and bracketing borders to see what frame size results. If the frame size doesn't suit us, we can modify the spaces or borders. In our case, we have four windows of 3-3/4" and bracketing borders of 2". This takes up 19" of space. There are three spaces between the windows. If the spaces between the windows are the same width as the bracketing borders (2" each), this brings us to a total frame width of 25".
For the height dimension, we have two windows of 5-3/4" with one space between them. If the spaces are the same size as the bracketing borders, this will bring us to a total frame height of 17-1/2".
Looking this over, we see that if we push the height up to 18" and reduce the width to 24", we can fit a standard sized frame of 18"x 24". However, we aren't allowed to change the spaces between the windows as this will throw the whole appearance out of whack. On the other hand, it's all right to change the top and bottom borders, making them marginally wider than the side borders. So if we increase the top and bottom borders to 2 1/4 " and leave the single space between the windows at 2", we arrive at a frame height of 18".
To arrive at 24" for the width, we must reduce the frame dimension by an inch. We can do this by reducing the space between each window by 1/4", and then reducing each side border by 1/8". After our modifications, we end up with side borders of 1-7⁄8"; top and bottom borders of 2-1/4", spaces between the windows on the width dimension of 1-3/4"; and spaces between the windows on the height dimension of 2". Now the multiple opening mat will fit into an 18"x24" frame and we are ready to cut it.
Step One: Mark out the windows on your mat blank.
Step Two: Remove the mat guide from your mat cutter, lift the guide rail and place the mat in the cutter. Lower the guide rail.
Step Three: Concentrate on cutting one window at a time. Align one of the pencil lines defining one of the windows along the guide rail. If you are cutting with a Simplex, Intermediate or Compact mat cutter, always be sure the window is situated to the right of the guide rail as you cut. If the window is ever to the left of the guide rail, you will end up with a "reverse bevel", a bevel that slopes outward toward the back of the mat and is not visible from the face. A reverse bevel will ruin the mat, requiring you to start over again.
Step Four: Cut one window at a time. Cut all four sides of the window and the drop-out piece will fall away.
Step Five: Repeat the procedure for the remaining windows, focusing on proper placement of each window relative to the guide rail before cutting. The finished multiple-opening mat will result.


