Guide Navigation
Introduction to Picture Framing & Matting
Designing Your Picture Frames and Mats
Color Selection
Matboard Types
Frame Types
Mat styles
Glass types
Measuring and Sizing Picture Frames and Mats
Mats
Frames
Costs of Picture Framing
DIY Picture Frames
Mat Cutting
Cutting mat board sheet to size
- Making the Most of a 32 x 40 Sheet
- Trimming Mat Board to Size
- Trimming Mat Board to Size with Straight Edge
- Trimming Mat Board to Size with Compact
- Trimming Mat Board to Size with Simplex
- Mat Cutting
- Cutting Single Mat Using a Straight Edge
- Cutting a Single Mat With a Simplex-Basics
- Cutting a single mat with a simplex-detailed
- Cutting a double mat
- Cutting a double mat- detailed professional version
- The professional framers secret for cutting a double mat
- How to measure and cut a double mat,
- Cutting a stepped corner mat – basics
- Cutting stepped corner mats – detailed
- Offset (stepped) corner mat
Mat Cutter Choices
Mat Cutting Help, Troubleshooting and FAQs
- Slip sheets
- The importance of using a slip sheet when cutting
- The importance of using a backing sheet
- Why am I getting a ragged cut?
- How to avoid rough or ragged edges when cutting mats
- Dealing with inconsistencies in the bevel edges
- Adjusting your mat cutter for proper blade depth
- The importance of proper blade depth
- Why am I getting a hook in the corners or curve in the bevel cut?
- How come I don't cut all the way through the mat board?
- How to conquer overcuts and undercuts?
- Dealing with overcuts and undercuts
- Why am I getting overcuts in the corners?
- Why are my mats not coming out square?
- Why is my bevel cut going the wrong way?
- How to cut left handed
- How to cut a 40" sheet of mat board on the 32" compact mat cutter
- Is using production stops the fool proof way to get perfect mats?
- Tips for working with production stops on your mat cutter
- Basic mat cutter maintenance
Mounting Your Artwork
Methods of Mounting
- Mounting your artwork
- Grappling with conservation and archival mounting concerns
- Supporting Artwork
- Hinge mounting T, V and S methods
- A simple method to a T-hinge mount
- Trapping methods
- Permanent mounting
- Wet mounting
- Pressure sensitive adhesive mounting
- How to mount artwork using positionable mounting adhesive (PMA)
- Spray adhesives
Glazing with Glass and Plastic
Securing or Fitting your Artwork in a Picture Frame
Finishing Your Artwork
Operating the Logan #201 Oval & Circle Mat Cutter may seem awkward the first time. When rotating the cutting arm in a clockwise direction it seems natural to switch your hand placement on the base and cutting arm. If you're not careful this can cause the base of the mat cutter to be lifted out of the center of the mat and the cut will not line up as it comes around. A simple way to avoid this problem is not to switch hands at all but instead rotate the mat and cutter. Instead of switching hands, leave your left hand on the base and rotate the entire mat and mat cutter back up to the two o'clock position. This way your left hand never leaves pressure off the base and prevents it from lifting out of the mat.
| Start with your left hand on the base and your right hand on the scale arm. | 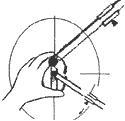 |
| Pull the cutting head around from the two o'clock position to the five o'clock position. | 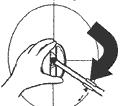 |
| With your left hand holding onto the base only, twist the mat cutter and mat so the scale arm is back to the two o'clock position and continue. | 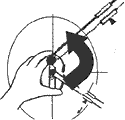 |


