- Making the Most of a 32 x 40 Sheet
- Trimming Mat Board to Size
- Trimming Mat Board to Size with Straight Edge
- Trimming Mat Board to Size with Compact
- Trimming Mat Board to Size with Simplex
- Mat Cutting
- Cutting Single Mat Using a Straight Edge
- Cutting a Single Mat With a Simplex-Basics
- Cutting a single mat with a simplex-detailed
- Cutting a double mat
- Cutting a double mat- detailed professional version
- The professional framers secret for cutting a double mat
- How to measure and cut a double mat,
- Cutting a stepped corner mat – basics
- Cutting stepped corner mats – detailed
- Offset (stepped) corner mat
- Slip sheets
- The importance of using a slip sheet when cutting
- The importance of using a backing sheet
- Why am I getting a ragged cut?
- How to avoid rough or ragged edges when cutting mats
- Dealing with inconsistencies in the bevel edges
- Adjusting your mat cutter for proper blade depth
- The importance of proper blade depth
- Why am I getting a hook in the corners or curve in the bevel cut?
- How come I don't cut all the way through the mat board?
- How to conquer overcuts and undercuts?
- Dealing with overcuts and undercuts
- Why am I getting overcuts in the corners?
- Why are my mats not coming out square?
- Why is my bevel cut going the wrong way?
- How to cut left handed
- How to cut a 40" sheet of mat board on the 32" compact mat cutter
- Is using production stops the fool proof way to get perfect mats?
- Tips for working with production stops on your mat cutter
- Basic mat cutter maintenance
- Mounting your artwork
- Grappling with conservation and archival mounting concerns
- Supporting Artwork
- Hinge mounting T, V and S methods
- A simple method to a T-hinge mount
- Trapping methods
- Permanent mounting
- Wet mounting
- Pressure sensitive adhesive mounting
- How to mount artwork using positionable mounting adhesive (PMA)
- Spray adhesives
Perfect mats begin with perfectly squared matboards. It is important to begin with a squared matboard in order to cut squared mats with parallel borders.
Most matboards are available in the standard 32" x 40" size. But the actual size of the board will probably be a fraction larger to allow for changes in humidity during shipping and storage. A full sheet of matboard may be squared by trimming off the excess, creating a true 32" x 40" board. This is a valuable first step, before cutting the matboard to the size needed for the mat.
Depending upon the style of mat cutter, a full sheet of matboard may not fit in the machine. Matboards may have to be manually cut to a smaller size before they can be used. Check the instructions that come with the cutter—they should state the maximum size of board the machine will accommodate.
Once the board is squared, and trimmed to a smaller size if necessary for the mat cutter, the next step is to cut the board to the outside dimensions of the mat—this is called "blanking" the board.
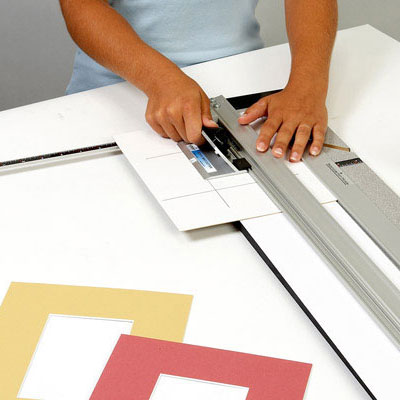
Pull the straight cutter towards you to trim boards.


